Sunday, October 13, 2013

Raspberry PI: Transmitting Telemetry via UHF

Equipment used:
  • UBlox Neo 6M GPS
  • NTX2 UHF transmitter
  • Raspberry Model B
GPS

The GPS uses 3.3V so connect the GPS to the appropriate GPIO pins for 3.3V working 


Install the GPS software
#apt-get install gpsd gpsd-clients python-gps
Then edit /boot/cmdline.txt ammend the "ttyAMA0" parameter to read dwc_otg.lpm_enable=0 console=tty1 root=/dev/mmcblk0p2 rootfstype=ext4 elevator=deadline rootwait edit /etc/inittab comment (add a hash #) the line below "#Spawn a getty on Raspberry Pi serial line" like this: #T0:23:respawn:/sbin/getty -L ttyAMA0 115200 vt100 edit /boot/config.txt insert to set the baud rate for the neo 6M to 9600bps
init_uart_baud=9600

edit /etc/default/gpsd:
and change the DEVICES to indicate "/dev/ttyAMA0"

Reboot and test the gps data. You can test the rx data with minicom :
#minicom -b 9600 -o -D /dev/ttyAMA0
you should see a stream of gps info Run gpsd
# gpsd /dev/ttyAMA0 -F /var/run/gpsd.sock
and you can check the incoming data with cgps -s UHF transmission 
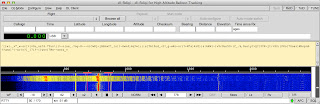
Run gprx on the mac to receive the 434 Mhz uhf signal and dl-fdigi to decode the audio that is being sent with the carrier.

Set the serial port to the correct settings:
# stty 50 cs7 cstopb < /dev/ttyAMA0


I run a quick cycled message to see if I can pick up the message via audio.
# while x=1; do echo Hello Out There > /dev/ttyAMA0; sleep 2; done
I pulled up quick script (be careful I said it was quick)

#!/usr/bin/python

import os
import serial
import time
import crcmod

x_list = []
y_list = []

def send(data):
 NTX2 = serial.Serial('/dev/ttyAMA0', 50, serial.SEVENBITS, serial.PARITY_NONE, serial.STOPBITS_TWO)
 NTX2.flush()
 NTX2.write(data)
 print "sent "+ data
 NTX2.close()


while True:
 gps = serial.Serial('/dev/ttyAMA0',9600, timeout=2)
 line = gps.readline()
 if 'GPGGA' not in line:
 continue
 #gps.flush()
 gps.close()
 time.sleep(0.5)
 print line
 fields = line.split(',')
 utc = fields[1]
 lat = (fields[2])
 N = fields[3]
 lon = fields[4]
 E = fields[5]
 FS = int(fields[6])
 NoSV = fields[7]
 HDOP = fields[8]
 msl = fields[9]
 uMsl = fields[10]
 Altref = fields[11]
 uSep = fields[12]
 DiffAge = fields[13]
 DiffStation = fields[14]
 if FS == 0:
 print "not synched"
 continue

 utc = float(utc)
 t = "%06i" % utc
 h = t[0:2]
 m = t[2:4]
 s = t[4:6]
 utc = str(str(h) + ":" + str(m) + ":" + str(s))

 y = int(lat[:2]) + float(lat[2:]) / 60.
 y = "%02.2f" % y
 if N == 'S':
 y = -y

 x = int(lon[:3]) + float(lon[3:]) / 60.
 x = "%02.2f" % x
 if E == 'W':
 x = -x

 print FS, x, y, NoSV, msl, DiffStation
 string = "DATA " + str(NoSV) + ',' + utc + ',' + str(x) + ',' + str(y) + ',' + str(msl) + "\n"
 send(string)


References:


http://ukhas.org.uk/guides:raspberrypi
http://diydrones.com/profiles/blogs/how-to-connect-3dr-gps-ublox-to-raspberry-pi
http://www.danmandle.com/blog/getting-gpsd-to-work-with-python/
http://www.raspberrypi.org/phpBB3/viewtopic.php?f=41&t=53012
http://www.satsignal.eu/ntp/Raspberry-Pi-NTP.html
http://elinux.org/RPi_Low-level_peripherals#General_Purpose_Input.2FOutput_.28GPIO.29
https://pypi.python.org/pypi/crcmod
https://github.com/ibanezmatt13/NORB


Saturday, September 21, 2013

Raspberry PI Notes (Zoneminder)

Using the raspberry camera module to setup zoneminder run:

# apt-get install zoneminder

this takes about 2 hours. From a remote machine http wasnt working so I did this:

# sudo ln -s /etc/zm/apache.conf /etc/apache2/conf.d/zoneminder.conf

and restarted apache

# service apache2 restart

Now I can see the zm page at: http://192.168.2.21/zm/index.php

following instrucitons from

http://redlegoman.blogspot.co.uk/2013/05/using-raspberry-pi-camera-module-with.html

I downloaded vlc:

# apt-get install vlc

rebooted then streamed the video to a network port from a non privileged user:

$ raspivid -o - -t 9999999 -w 320 -h 240  | cvlc -vvv stream:///dev/stdin --sout '#rtp{sdp=rtsp://192.168.2.21:8554/pi.sdp}' :demux=h264

In zoneminder set up a new monitor and add the following as the source path:

rtsp://192.168.2.21:8554/pi.sdp

In general the source type needs to be ffmpeg and the capture width and height is 320/240 resp.

I left everything else default

Friday, September 20, 2013

Raspberry  PI Notes (camera module)

Stream video to a remote machine using nc and the on board camera module.

1. plug in camera and enable camera via the raspi-config, no other software is needed at this stage

2. On the remote viewing pc install mplayer (I used brew install mplayer) and run the receipt cache - a mplayer screen will pop up with the video when a stream is received:

# nc -l 5001 | mplayer -fps 40 -cache 2024 -

3.  On the raspberry run the video stream:

# raspivid -rot 180 -t 200000 -o - | nc 192.168.2.18 5001

Tuesday, August 6, 2013

Iphone 4 microphone fault

After being dropped or similar the audio compiler malfunctions. I proved the problem by placing a call and (removed back) pressed on the area where the compiler chip is and confirmed sound was working while pressing only.

Follow this for the best detailed removal and replacement video...

http://www.youtube.com/watch?v=DPR8qrAcg5g
Raspberry Pi Notes (img Backups)

If you have a good build and dont want to loose it....


Grab the SD card out and stick it in the mac, go to a terminal and type


# diskutil list

/dev/disk0
   #:                       TYPE NAME                                       SIZE            IDENTIFIER
   0:                       GUID_partition_scheme                        *251.0 GB   disk0
   1:                       EFI                                                       209.7 MB   disk0s1
   2:                       Apple_HFS Macintosh HD                     250.1 GB   disk0s2
   3:                       Apple_Boot Recovery HD             650.0 MB   disk0s3
/dev/disk1
   #:                       TYPE NAME                                      SIZE       IDENTIFIER
   0:                       FDisk_partition_scheme                        *2.0 GB     disk1
   1:                       Windows_FAT_32 System                    131.1 MB   disk1s1
   2:                        Linux                                                  805.3 MB   disk1s2

# umount /dev/disk1


# dd bs=1024 if=/dev/disk1 of=20130806-raspberry.img

This last one takes about 1/2 hour but it creates an img on the mac that can be dumped to another SD card at will later with:

# dd bs=1024 of=/dev/disk1 if=20130806-raspberry.img

This is how I keep backups of my good builds. Keep in mind that there is no compression involved and a 16G SD disk will take up 16G of space on the mac.
Raspberry PI Notes (Wifi and Bluetooth)

Wifi 


I used the following usb dongles without any trouble:


Edimax, Cisco (Linksys) WUSB600N, Belkin F7D1101 v1 


Edimax


> 802.11n WLAN Adapter:
>

> Product ID: 0x7811
> Vendor ID: 0x7392
> Version: 2.00
> Serial Number: 00e04c000001
> Speed: Up to 480 Mb/sec
> Manufacturer: Realtek
> Location ID: 0x1a120000 / 4
> Current Available (mA): 500
> Current Required (mA): 500


Cisco
< Linksys WUSB600N Wireless-N USB Network Adapter with Dual-Band ver. 2:
<
< Product ID: 0x0079
< Vendor ID: 0x1737 (Hong Kong Applied Science and Technology Research Inst.)
< Version: 1.01
< Speed: Up to 480 Mb/sec
< Manufacturer: Linksys
< Location ID: 0x1a120000 / 4
< Current Available (mA): 500
< Current Required (mA): 450


Belkin
> Basic Wireless USB Adapter:
>
> Product ID: 0x945a
> Vendor ID: 0x050d (Belkin Corporation)
> Version: 2.00
> Serial Number: 00e04c000001
> Speed: Up to 480 Mb/sec
> Manufacturer: Manufacturer Realtek
> Location ID: 0x1a120000 / 4
> Current Available (mA): 500
> Current Required (mA): 500


Bluetooth 

I used this guide to get me started installing the bluez stack etc:http://www.ctheroux.com/2012/08/a-step-by-step-guide-to-setup-a-bluetooth-keyboard-and-mouse-on-the-raspberry-pi/


keyboard: I used an apple keyboard and magic mouse, using a old dongle I found from ISSC (this information is from the dongle):


> ISSCEDRBTA:
>

> Product ID: 0x1001
> Vendor ID: 0x1131 (Integrated System Solution Corp.)
> Version: 3.73
> Speed: Up to 12 Mb/sec
> Manufacturer: ISSC
> Location ID: 0x14200000 / 7
> Current Available (mA): 500
> Current Required (mA): Unknown (Device has not been configured)


Make the keyboard discoverable (I took the batteries out and put back, then press button on side, green light should flicker on and off).

record the MAC address

# hcitool scan

pair it
# echo 0000|bluez-simple-agent hci0 BB:0F:FE:82:D1:C5

Then enter 0000 on BT keyboard
trust the keyboard...

# bluez-test-device trusted BB:0F:FE:82:D1:C5 yes

connect the keyboard...

# bluez-test-input connect BB:0F:FE:82:D1:C5


Make the mouse discoverable ( I switched it off and on again)

# hcitool scan

record the MAC address

# echo 0000|bluez-simple-agent hci0 BB:0F:FE:82:D1:C6

trust the mouse...

# bluez-test-device trusted BB:0F:FE:82:D1:C6 yes

connect the mouse...

# bluez-test-input connect BB:0F:FE:82:D1:C6

All devices remain intact on reboot.

Wednesday, March 27, 2013

Using systemd in Fedora.....

To permanently enable a service:

#  systemctl enable ntpd.service

To start it:

# systemctl start ntpd.service

To view all services:

# systemctl